As an Amazon Associate I earn from qualifying purchases.
Creating DIY jewelry organizers can be a fun and rewarding project, allowing you to personalize your space and keep your jewelry neatly displayed and organized.
DIY jewelry organizers are a game-changer for several reasons:
Why DIY?
Cost-Effective: Crafting your own jewelry organizer can be significantly cheaper than purchasing pre-made ones. You can often use materials you already have at home, saving money and reducing waste.
Customization: Everyone’s jewelry collection is unique, and DIY organizers allow you to create a storage solution that fits your specific needs and preferences, whether you have a lot of necklaces, rings, or earrings.
Decorative Element: These organizers can be more than just storage; they can be pieces of art! You get to design them to match your room’s decor, adding a personal touch to your space.
De-Cluttering: Having a designated place for your jewelry can help keep your bedroom or bathroom clutter-free. No more tangled necklaces or lost earrings!
Accessibility: With a DIY organizer, you can arrange your jewelry in a way that makes it easy to see and grab what you need, so you’re not rummaging through a box or drawer.
How I Like to Use Coconut Oil on My Hair
Here are 15 DIY jewelry organizer ideas based on the images you’ve uploaded, with a description of each image and a simple step-by-step guide on how to create them.
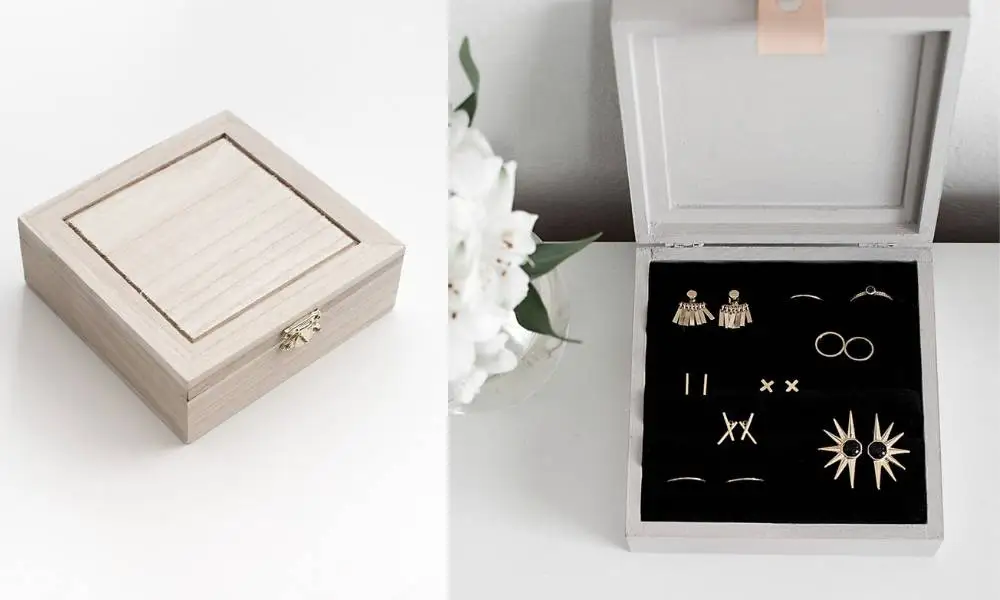
1. Elegant Box Jewelry Organizer
The first image shows a sleek, white jewelry box with a hinged lid, revealing a black velvet interior with a variety of gold jewelry pieces neatly arranged. This simple yet sophisticated design is perfect for a minimalist aesthetic.
Materials:
A wooden box
White paint
Hinges
Black velvet
Jewelry inserts
Steps:
Paint the wooden box white and let it dry completely.
Attach the hinges to the box to create a lid that opens and closes.
Line the interior with black velvet.
Insert jewelry holders or make compartments using cardboard covered in velvet.
Arrange your jewelry inside.
2. Wooden Stand Jewelry Holder with Round Mirror
The second image depicts a wooden jewelry stand with a round mirror and hooks for hanging jewelry. This stand is functional and decorative, adding a rustic charm to the room.
Materials:
Wooden plank
Circular mirror
Hooks
Paint or wood stain
Steps:
Stain or paint the wooden plank.
Attach the circular mirror to the top section of the plank.
Screw in hooks below the mirror at different heights.
Use the hooks to hang necklaces and bracelets.
3. Wall-Mounted Jewelry Hooks
The third image illustrates a simple, space-saving solution with hooks mounted on the wall for hanging jewelry. This is great for utilizing vertical space and can be customized to fit any decor style.
Materials:
Wooden plank
Paint or wallpaper
Hooks
Steps:
Paint or cover the wooden plank with wallpaper.
Attach the hooks evenly spaced along the plank.
Mount the plank on the wall.
Hang your jewelry on the hooks.
4. Copper Pipe Jewelry Tree
In the fourth image, we see an innovative jewelry tree made from copper pipes. This organizer has a modern industrial look and can hold a variety of jewelry.
Materials:
Copper pipes and fittings
Pipe cutter
Marble tile for base
Epoxy glue
Steps:
Cut the copper pipes into various lengths for the stand and arms.
Assemble the tree using copper fittings to join the pipes.
Glue the copper tree to the marble tile to create a stable base.
Hang your jewelry on the arms of the tree.
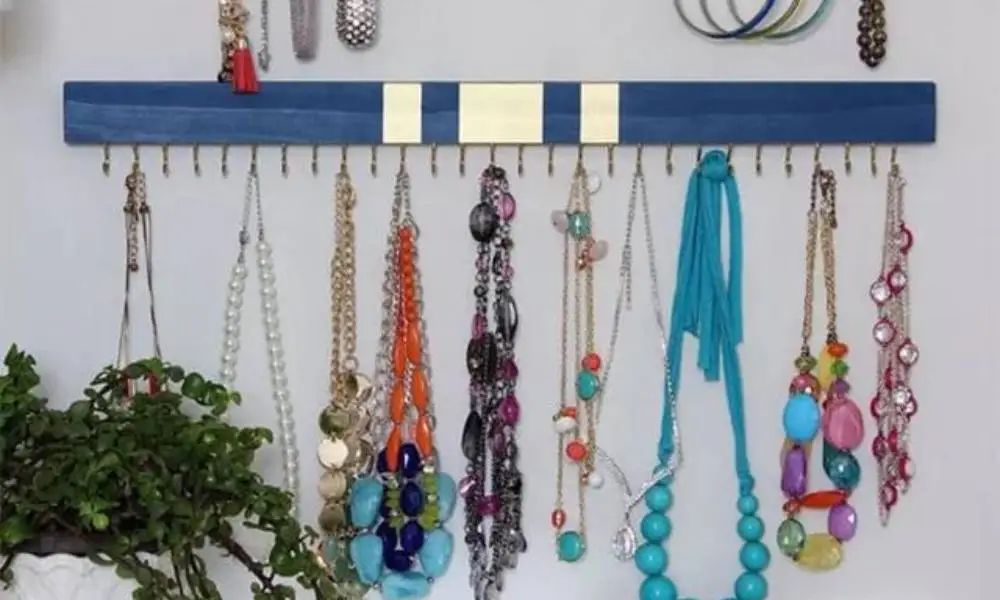
5. Hanging Jewelry Organizer
The fifth image presents a bold, colorful hanging organizer made from painted wood strips and hooks. This organizer provides a vibrant backdrop for your jewelry and can be customized with different colors and patterns.
Materials:
Wood strips
Paint
Hooks
Hanging hardware
Steps:
Paint the wood strips in your desired colors.
Attach hooks to the strips.
Add hanging hardware to the back of each strip.
Mount the strips horizontally on the wall, spaced out to your liking.
Use S-hooks or small pieces of wire to hang earrings and necklaces from the mesh.
Author Tips
Each of these organizers can be tailored to fit your personal style and the size of your jewelry collection. They are not only practical but also serve as decorative pieces that can enhance the look of your room. Happy crafting!
Let’s explore 9 more DIY jewelry organizer ideas, inspired by the additional images you’ve uploaded:
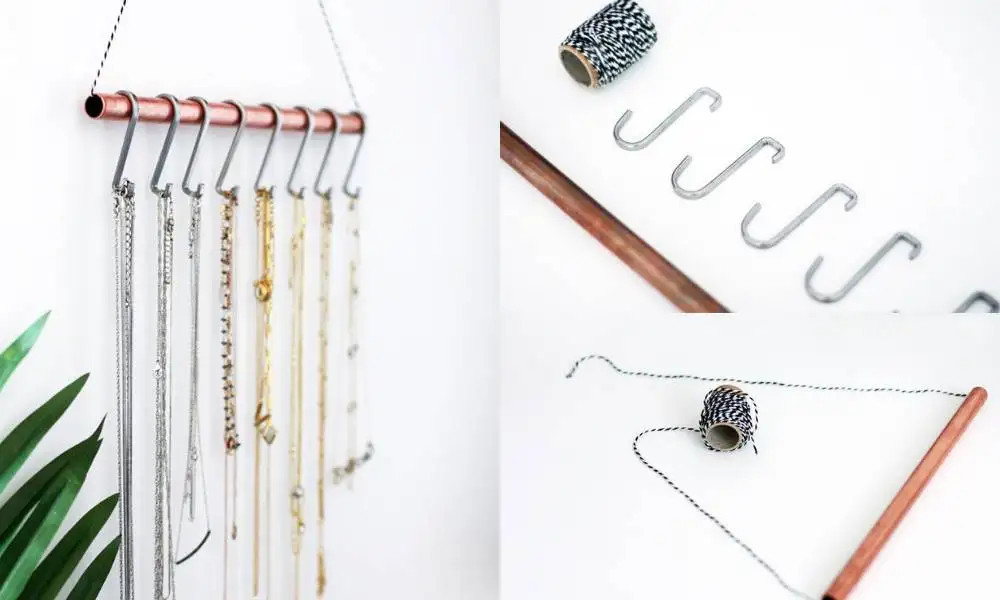
7. Copper Pipe Necklace Hanger
This image shows a hanging copper pipe jewelry organizer from which several necklaces are suspended. It’s an industrial chic look that is both functional and decorative.
Materials:
Copper pipe
Copper S-hooks
Chain or cord for hanging
Drill (if necessary)
Steps:
Cut the copper pipe to the desired length.
If necessary, drill holes at each end of the pipe to attach the chain or cord.
Insert S-hooks into the pipe.
Hang the pipe using the chain or cord.
Hang necklaces on the S-hooks.
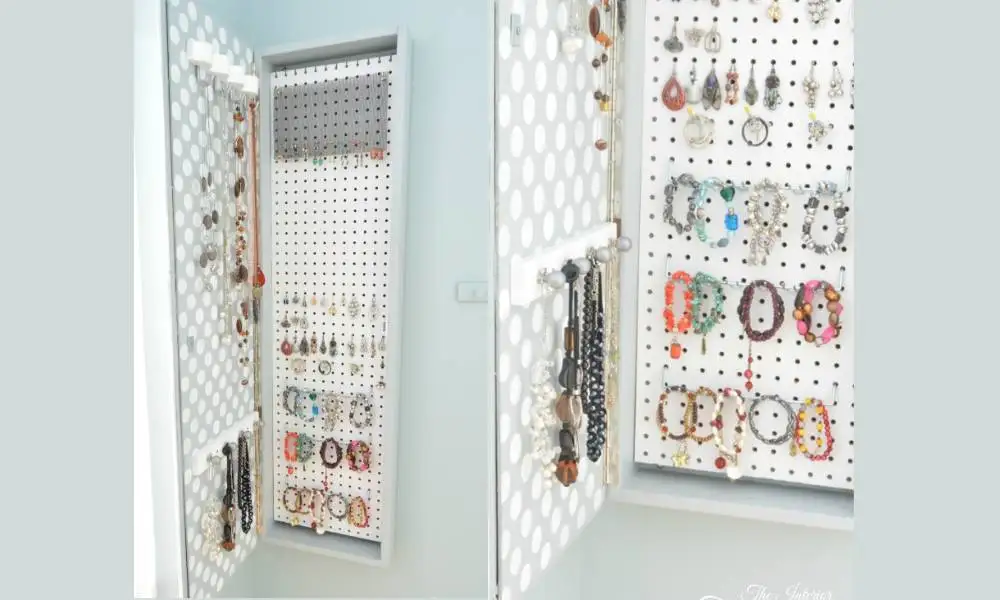
8. Pegboard Jewelry Wall
This jewelry organizer features a white pegboard with an array of jewelry hanging from pegs, displaying an efficient use of space.
Materials:
Pegboard
Assorted pegboard hooks
Frame (optional)
Steps:
Mount the pegboard on the wall or fit it within a frame.
Insert hooks into the pegboard holes.
Arrange your jewelry on the hooks.
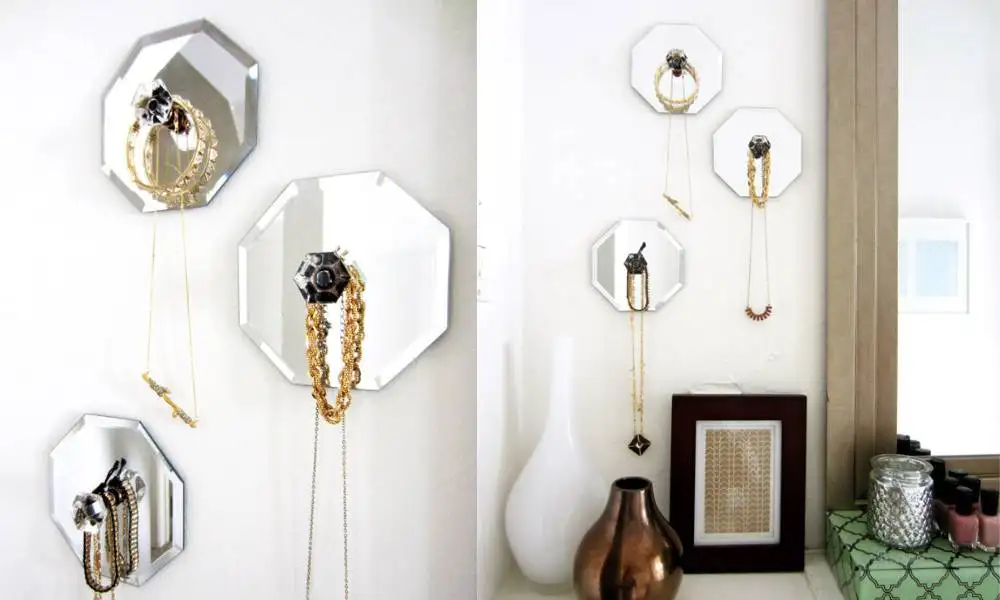
9. Mirror Knob Hangers
Seen in this image are mirrored knobs mounted on the wall, with necklaces draped over them. It’s a minimalist design that turns jewelry into wall art.
Materials:
Decorative mirror knobs
Wall anchors
Steps:
Install wall anchors where you want to hang the knobs.
Screw the mirror knobs into the anchors.
Hang jewelry from the knobs.
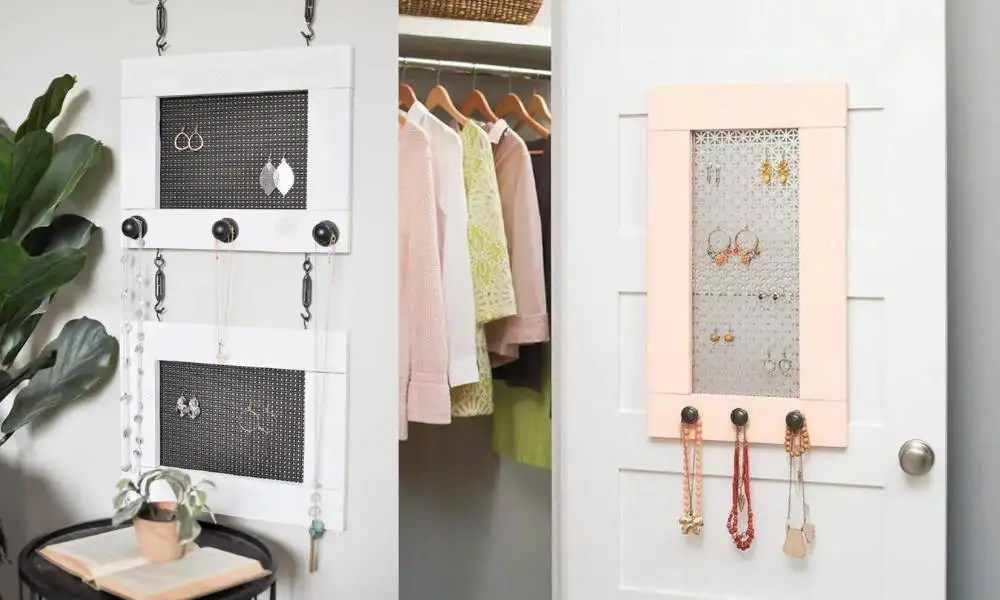
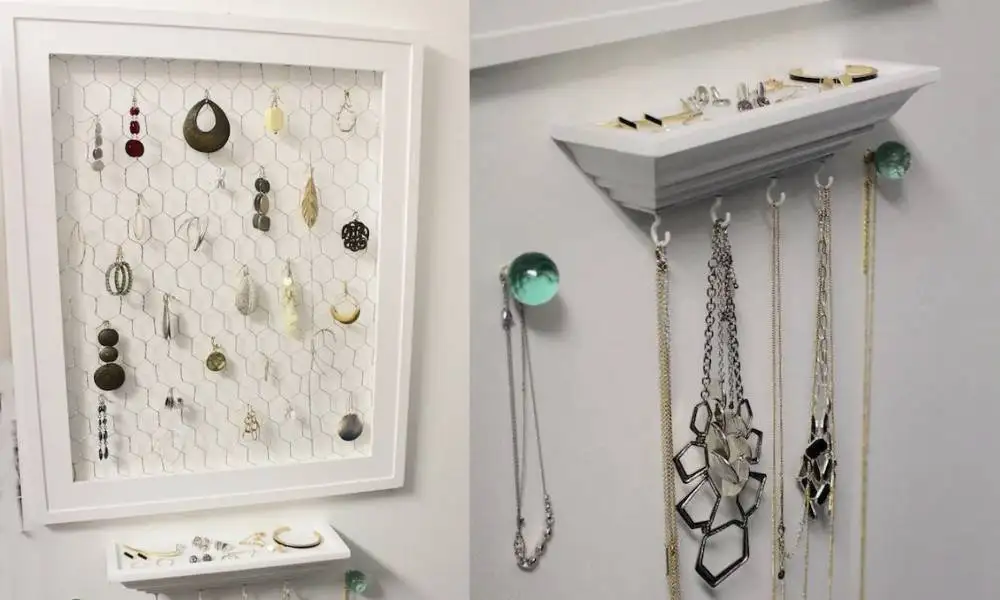
10. Chicken Wire Frame Earring Holder
This picture shows a painted frame with chicken wire stretched inside it, perfect for hanging earrings and other small items.
Materials:
Wooden picture frame
Chicken wire
Staple gun
Steps:
Paint the frame in the desired color.
Cut the chicken wire to fit the frame.
Stretch and staple the chicken wire to the back of the frame.
Hang earrings by inserting them into the holes of the wire.
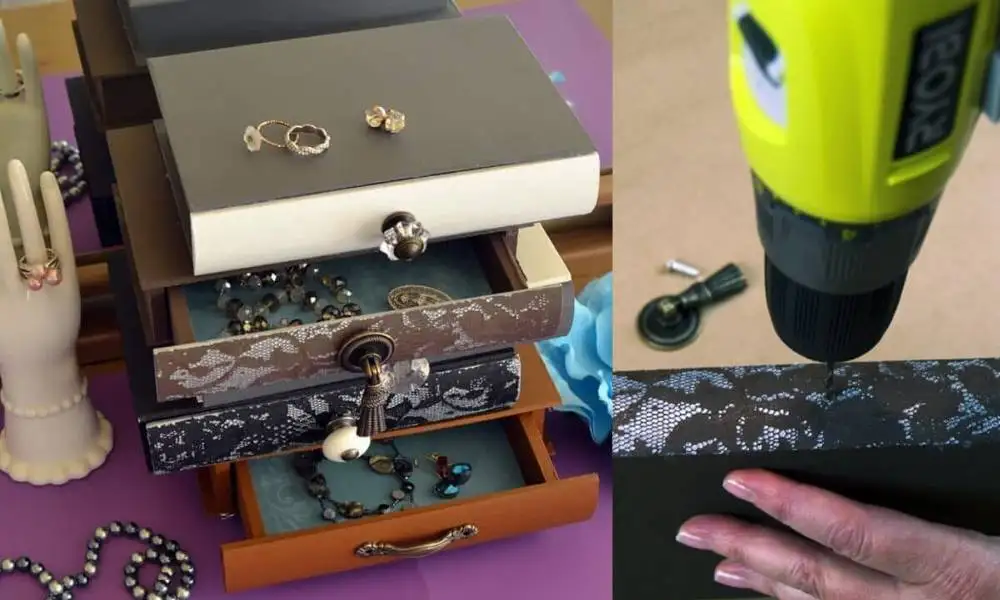
Hollow out the center of the books using a craft knife.
Glue the books together, ensuring the hollowed sections align.
Place jewelry inside the created compartments.
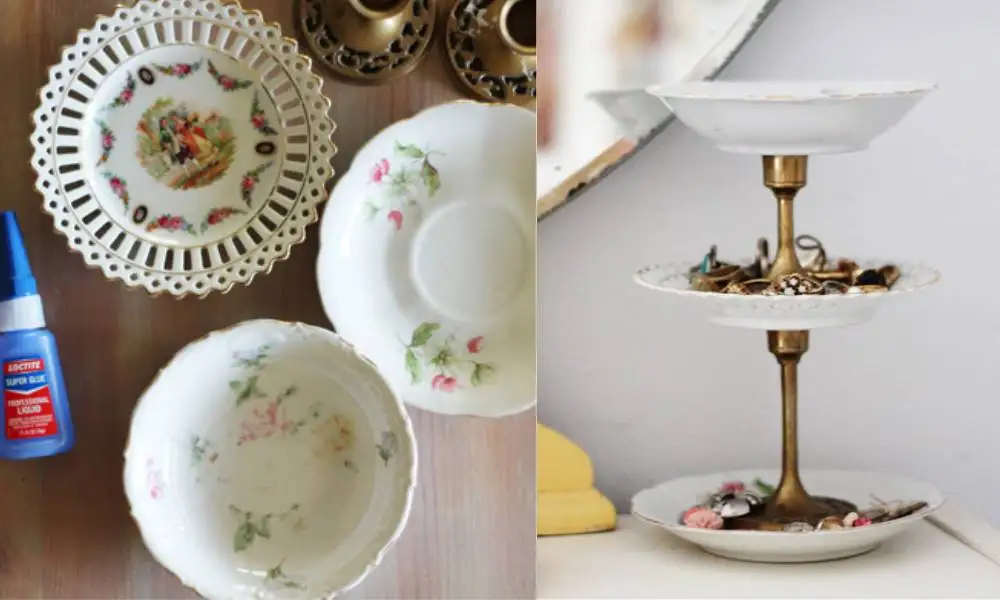
12. Tiered Plate Jewelry Stand
A tiered stand made from repurposed plates and a candlestick is shown, which makes a charming holder for various jewelry items.
Materials:
Vintage plates
Candlestick
Strong adhesive glue
Steps:
Glue the bottom plate to the candlestick base.
Attach the second plate to the top of the candlestick.
Let the glue dry before placing jewelry on each tier.
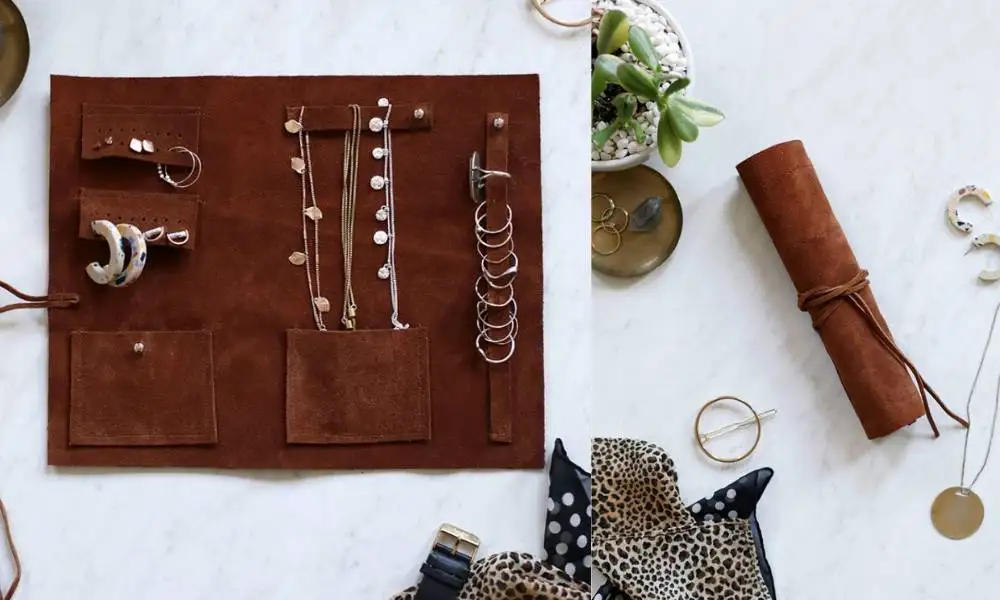
13. Leather Jewelry Mat
In this image, a flat leather mat with pockets and straps is laid out, providing an organized and soft surface for jewelry storage.
Materials:
Leather or faux leather
Scissors
Rivets or sewing materials
Steps:
Cut the leather to the desired size.
Create pockets and straps by folding and securing the leather with rivets or stitches.
Place jewelry in the pockets and hang items on the straps.
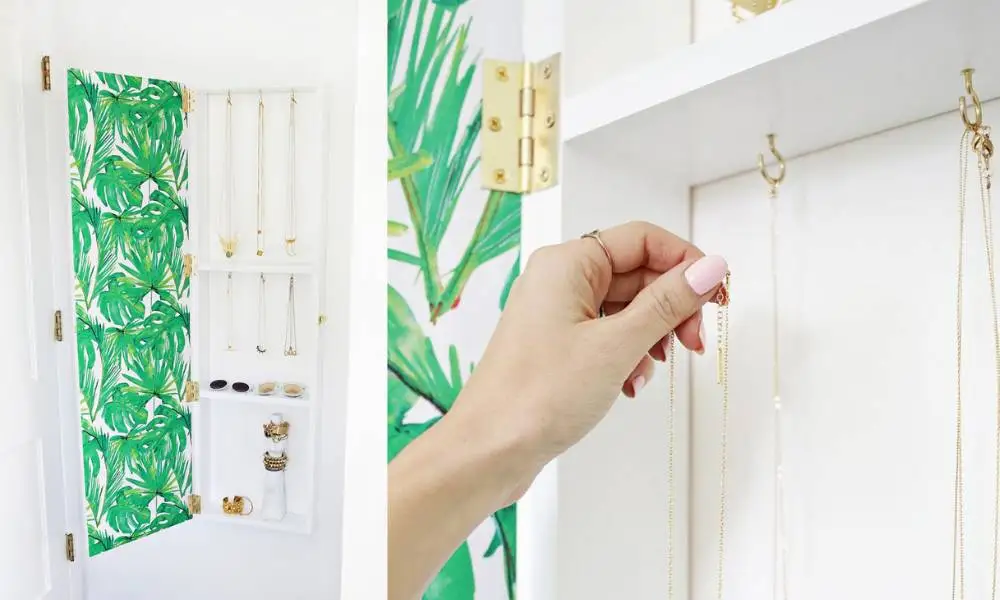
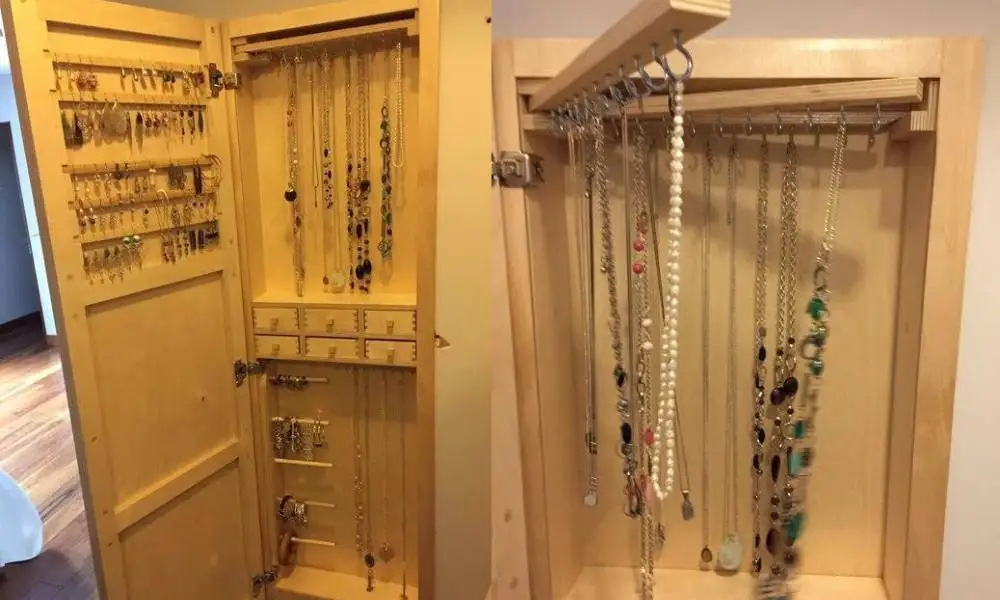
14. Jewelry Cabinet Made of Birch Plywood
Building a jewelry cabinet from birch plywood with oak knobs is a fantastic DIY project that combines functionality with aesthetic appeal. Here’s how you could go about it:
Materials:
Birch plywood for the main structure
Oak wood for the knobs
Fabric of your choice
Corkboard
Wood glue
Screws and hinges for assembly
Sandpaper
Wood finish or paint
Tools for cutting and assembling wood (saw, drill, screwdriver, etc.)
Steps:
Design Your Cabinet: Sketch out the dimensions of your cabinet, including the placement of shelves, hooks, or rods for hanging jewelry.
Cut the Plywood: Using a saw, cut the birch plywood to the sizes needed for the sides, top, bottom, back, and door of the cabinet.
Assemble the Frame: Glue and screw the sides, top, and bottom to the back panel to create the cabinet’s frame. Sand any rough edges for a smooth finish.
Prepare the Door: Cut out three square sections on the door where the pinning board will be placed.
Add the Knobs: Craft small knobs from the oak wood. Sand them smooth before attaching them to the door with wood glue or screws.
Install the Door: Attach the door to the frame using hinges. Ensure it opens and closes smoothly.
Create the Pinning Board: Cut the corkboard to fit the square sections on the door. Cover the corkboard with fabric, securing it at the back with glue or staples. Then, fit the covered boards into the door squares.
Finish the Cabinet: Apply a wood finish or paint to protect the cabinet and add to its visual appeal. Let it dry completely.
Add the Hardware: Install hooks, rods, or racks inside the cabinet to hang and organize your jewelry.
Mount the Cabinet: Depending on the size and weight, mount your cabinet to the wall using appropriate fixtures and supports.
Your DIY jewelry cabinet is not just a storage solution but a personal statement piece. The birch plywood provides a sturdy and elegant body, while the oak knobs add a touch of sophistication.
The fabric-covered corkboard squares serve as a versatile pinning area for brooches, earrings, or reminder notes. This project is a beautiful mix of utility and design, perfect for organizing your jewelry in style.
15. Natural Twig Jewelry Tree
The final image depicts a jewelry tree made from twigs, creating an organic and rustic display for hanging various types of jewelry.
Materials:
Twigs of different lengths
Hot glue gun
Base to stand twigs (like a wooden block)
Steps:
Arrange the twigs into a tree shape.
Use hot glue to secure the connections.
Attach the base of the tree to a sturdy wooden block.
Hang jewelry on the branches of your natural tree.
FAQs
Q: Do I need special tools to make my own jewelry organizer?
A: Not necessarily! Many DIY projects can be done with basic tools like scissors, glue, and paint. For more complex projects, a drill or staple gun might be helpful, but there are plenty of simple designs that require no special tools at all.
Q: Can DIY jewelry organizers be good gifts?
A: Absolutely! A handmade jewelry organizer is a thoughtful and personal gift. It shows you’ve put time and effort into creating something unique that the recipient can use every day.
Q: How do I ensure my DIY jewelry organizer is durable?
A: Choose sturdy materials and make sure to secure all parts well. If you’re using glue, allow it to cure fully before hanging any heavy pieces of jewelry. For wall-mounted organizers, ensure they’re properly anchored to the wall.
Conclusion
These creative DIY jewelry organizer ideas offer a range of styles from rustic to modern, using materials that are often readily available at home or can be purchased easily.
Each provides a unique way to display and organize your jewelry, adding both functionality and a personal touch to your decor.